So, when this month's challenge for Have the Cake was posted I was in the midst of a 3-day juice cleanse. No caffeine, no alcohol, no anything but raw fruits and vegetables. Why? Something about detoxifying. Anyway, when you can't eat you find yourself fantasizing about eating, cooking, baking and everything but choking down yet another icy cold all-fruit smoothie or a shot of gag-inducing wheat grass.
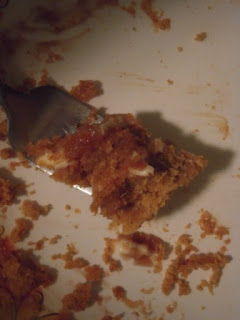
Then I see it; layer cake. Mmmmmm...cake. I spent my weekend searching endless amounts of cake recipes trying to decide what the greatest, most delicious, decadent yummi-ness I could set myself to the task of making. Here is what I decided on: A three-layer Pumpkin Spice Cake frosted with caramel frosting AND cream cheese frosting between each layer. I combined three different recipes to come up with what I hoped to be the world's greatest cake ever.
The pumpkin cake recipe is from Country Living and can be found here. I was making this to bring to a family gathering and got a request to leave out the nutmeg. I substituted by adding a little more cinnamon. I also used Splenda Sugar instead of real sugar. Other than that, I stuck with what was written.The recipe was easy and the cake came together beautifully. I was a little nervous that the layers seemed awfully thin but once they were loaded down with cream cheese and caramel it was fine.
For the cream cheese frosting I used this recipe from AllRecipes. Some of the others just used way too many ingredients (heavy cream, rum, etc) and I wanted something more plain since I was also adding caramel. Delicious and it covered the giant crack in my first layer just beautifully!
For the caramel frosting, I kind of improvised. It basically involved about 1/2 c. butter, 1 c. brown sugar, 1/4 c. milk, 1 t. vanilla and maybe 2 c/ of confectionery sugar. Melt everything on the stove together-add confectionery sugar until it's a good thickness for spreading. I poured caramel between each layer and then put the rest on the top of the cake.
End result? Love. The caramel made it a little over the top but it was delicious.
The only problem? I made the cake on Thursday and then the frosting on Friday night and didn't serve the cake until Saturday so it did dry out a little. That's my fault, though. The recipe made a really moist cake but I didn't have a proper cake container to store it so air got to it.
Posted by -colleen
Colleen's Addiction(s)
Monday, October 11, 2010
Tuesday, September 14, 2010
Hot Pretzels-Have the Cake's September Challenge
While some people are lured by the smell of Cinnabon wafting through the mall, the hot pretzel has always been my thing. It used to be Hot Sam's but with the opening of Auntie Anne's, Sam was tossed to the curb. I prefer just the plain pretzel with just a little bit of salt. No cinnamon sugar, no garlic, no fancy almond flavors and no dipping sauce. Just a mushy, doughy, hot buttered pretzel. That is perfection, people. This challenge was made for me. So, after searching through all the recipes on there I chose this one from allrecipes.com. It seemed simple enough and got really good reviews.
Rule #1 in baking. Read through your recipe first and follow directions. whoops. I put everything in my trusty mixer and started it kneading. Hmmmmm...It just wasn't coming together. I added more flour. A little more flour. It was just a sticky mess. I finally just dumped the dough in to a greased bowl and covered it to let it rise hoping that might make it better. While putting everything away I noticed my new, unopened bag of bread flour on the counter. Right. Forgot to add the cup of bread flour. Okay. In the garbage goes effed up batch number one.
Let's try this again. Amazing how much better it worked the second time around. Mixed up beautifully. Put it in the greased bowl to rise for an hour. Perfect. Cut the dough up in to 10 pieces. Rolled it out, made some pretzel-like shaped and dipped them in the warm water-baking soda mixture. Put the dough on to parchment paper on cookie sheets and in the oven for about 10 minutes.
All baked up they look a little pale and anemic but the bottoms were golden-colored so I knew they were done. I brushed each one with melted butter and sprinkled them with kosher salt. They were delicious. I ate them all. They made up all my lunch and dinner today. I would make these again for sure and may even give that whole cinnamon sugar thing a try.
Monday, August 16, 2010
I thought for sure I would make a savory galette (and I will be making the carmelized onion and butternut squash recipe from Smitten Kitchen at some point) but when I stumbled on this recipe on Cooking Light it was love at first sight. Pears, cheese, caramel. Need I say more?
The recipe itself said to use a pre-made refrigerated pie crust but where's the challenge in that? No. I must make my own. I pulled out my handy Betty Crocker Cookbook and found a recipe in there that I have used before. Problem being, I didn't have enough Crisco so I had to make the oil-based crust and well...it just wasn't the same. It was super-crumbly, tough to roll out and just looked plain sad. Luckily, galette does not need to be pretty. Rustic, I believe was the proper adjective for a galette. My crust was rustic looking. It looked much better with a layer of cheddar cheese on it (what doesn't look better when covered in cheese, right)
I peeled, cored and sliced up 5 bosc pears and tossed them in nutmeg and lemon juice. Then I added a little flour. WAY too many pears! Three would have been plenty. There is no way I could have piled all those pears on my sad little crust and had anything to fold up on the edges. If I had paid attention to the comments on the Cooking Light website, I would have known this. Live and learn. So I put on as many as I could while being able to pinch the edges of the crust up enough to hold everything together. Popped it in a 400 degree oven for about 20-25 minutes, let it cool a bit and then made up some caramel on the stove to pour over the top.
To my surprise, the crust cooked up nicely and was perfectly flaky. The cheese and pears combo is a nice one cold and even better when the pears are baked and sweetened on top of melted gooey cheese. Caramel drizzle? Can't really ever go wrong there. The only thing I wished I had was a little vanilla ice cream with it. The warm/cold collision would have made it even better.This was my submission for this month's Have the Cake Challenge!
Posted by -colleen
Monday, August 2, 2010
Sauce (almost) from scratch
In my efforts to cook more and eat less processed crap I decided to make my own sauce.
Adapted both these recipes from Skinny Italian, my new favorite cookbook.
Plain sauce:
28 oz can of tomatoes
1/4 cup tomato paste
2 teaspoons dried basil
Pour all the juices and broken up tomatoes into large saucepan (broke up tomatoes just by holding the can over the saucepan and squeezing them with my hands). Add paste and bring all to a boil. Lower heat, add basil and simmer.
Threw this over a little #11 spaghetti and topped with some peccorino romano cheese.
Took about 3/4 of this and made a spicier version too:
3 cups of above sauce
1 teaspoon red pepper flakes
4 cloves garlic chopped
1 teaspoon black pepper
I just threw this all together and simmered for a few minutes then poured it on top of 3 chicken breasts and 4-5 cubed red potatoes and cooked in the crock pot on low for 8 hours.
Sunday, August 1, 2010
July's Baking Challenge!
This is my submission for July's Have the Cake Challenge!
I was quite intimidated by this challenge and the humidity we have had all month has been an great excuse to put it off (and gain tips from my fellow bakers on what not to do and what to look out for)! So on the last day of the month I decided I had to put aside my fears and get baking.
The recipe I chose was from Simply Recipes. It uses the smaller individual pavlovas which I thought would work better.
I started by separating the eggs which was no easy task. As I learned from Rena, even a small amount of yolk would ruin everything so after getting three done perfectly, I slipped and dropped an entire egg in the whites. I tried to fish out the yolk whole but a little dribbled in so, sigh, I started over again. This time I smartened up and did one egg at a time in a different dish and then poured the whites in the mixing bowl when they were perfectly yolk free. I ruined only one more egg this way (and my dog has lots of yolks for dinner the next few nights). So egg whites and salt in the mixer and begin whisking (oh how I <3 my Kitchen Aid mixer)! I then gradually added the sugar and cornstarch. I used Splenda No Calorie Sweetener (NOT the Splenda for baking-that stuff is nasty) instead of regular sugar. After that had mixed a couple minutes I poured in the vanilla and distilled white vinegar, turned the mixer to high and left it going for about five minutes and did all the dishes.
Once it was nice and formed with stiff peaks, I spooned 8 large dollops of the meringue on a lined cookie sheet and put it in the oven. After about a half hour, they started to look a little beige so I did as the recipe said and lowered the temperature and turned the pan around.
I decided to do a fruit topping of blackberries and raspberries, heating them with some sugar until they broke up. I forgot to buy heavy cream for whip so I made up a little glaze for it as well using lemon curd, lemon juice, honey, vanilla and a little water. I just whipped it up until it was a nice thick but creamy substance.
Perfection! A delicious, light dessert!
Friday, July 16, 2010
Juice Cleanse
So, I decided (and I really am not quite sure why exactly) to try a 3 Day Juice Cleanse. It supposed to detoxify your body and purports you will feel fantastic at the end of day three. We shall see. Now, I'm actually quite excited to see what kind of results I may get but a little fearful of the process. I'm trying to eat better and learn to cook more (and better). I thought perhaps getting rid of some residual "stuff" might be a great incentive to keep moving forward.
The cleanse I chose allows for 3 smoothies and 3 juice drinks per day and lets you supplement with raw vegetables and fruit. All the smoothies and drinks are blended fresh for you each day to pick up in the morning.
I arrived at 7am on Friday for day 1. No coffee was my first challenge but the headache was only mild. I prepared lots of water with fresh lemons and limes to help keep it at bay. My menu for the day includes a Caribbean Cooler smoothie, an Acai smoothie and an Amazon Cherry Smoothie. All three have some variation of banana, orange juice, strawberry,and pineapple. For my juices, I chose 1 Immune Booster (just carrot and pineapple) and 2 Lemon Up (apple, carrot and lemon). Everything so far is delicious (honest!)! I was quite afraid of the taste of "pure" veggie and fruit juice. No sugar? No artificial sweeteners? My body hasn't been free of those for a day since...well it probably never has been.
So moving on into the afternoon it got pretty bad. In fact, it got downright awful. After lunch (my 2nd smoothie and some watermelon and red peppers) my headache started getting worse. I drank my water, made some tea but it just kept getting worse. I tried to drink my 2nd juice but I couldn't stomach it. The headache progressed and then I got nauseous. Very nauseous. I ended up having to leave work about an hour early.
When I got home, I collapsed for a couple hours and then felt much better. I couldn't face another smoothie or juice, though. I was anything but hungry.
Day 2
I picked up my day's supplies. Day 2 included a wheatgrass shot as a juice replacement. I was so happy because this was just a tiny little bit and I really wasn't ready for a big juice. This day was better. My head hurt a little but not like day 1. I had to go grocery shopping which was a bit difficult when you're not eating! I tried to compose a list ahead of time so I wouldn't come home with a crazy amount of crap or nothing at all since food was still not looking great to me.
I drank all 3 smoothies and two of the juices (the 3rd one was called Lean and Green. It just wasn't something I could do. I tried). I also made a big salad for dinner with lettuce, cucumbers and red peppers with lemon juice squeezed over it.
Day 3
I'm glad this is the last day. My head doesn't hurt anymore, though and I know I can finish this. I finished two out of three juices and all the smoothies. Other than that, I just munched on some fruit and veggies throughout the day.
All in all I'm glad I tried this. It was a challenge to me to see if I could not cheat! I wasn't hungry but can't wait to go back to regular food tomorrow!
Sunday, June 27, 2010
Homemade dog treats (x2)
Earlier in the week I made some fantastic Banana Crumble Muffins but I still had lots of of bananas left sooooo I decided to make treats for the dog instead of more muffins to stuff my own face with.
These were definitely a hit with the pup. Easy recipe. Made lots of treats. Since these do have fresh ingredients you have to freeze the unused portions until you are going to feed them to the dog.
Banana Treats (adapted from www.dogaware.com)
2 eggs
1/4 c. sunflower oil
1/2 c. honey
1/2 c. milk
2 or 2 1/2 mashed bananas
3 c. oats
1 1/4 flour
Blend first 5 ingredients together well. Add flour and oatmeal gradually. Spread mixture on to a baking sheet lined with parchment paper. Bake f0r 25 minutes at 325 degrees.
After baked and cooled I used a pizza cutter to slice these up into little snacks.
I also made some Peanut Butter Treats since they are also super-simple and are a big hit with any dog (what dog doesn't love peanut butter?).
Peanut Butter Treats (adapted from www.dogaware.com)
1/2 cup peanut butter
2 T. sunflower oil
1 cup water
2 cups all purpose flour
1 cup whole wheat flour
Combine peanut butter, oil and water. Add flour one cup at a time. Knead dough in to ball. Roll out 1/4 inch thick. Use cookie cutter to cut in to small shapes. Bake for 20 minutes at 350 degrees.Full belly and exhausted:
Subscribe to:
Posts (Atom)